12-12-1 Mainly included three machine and conveyor with motor. The three machine lonely manual as follow:
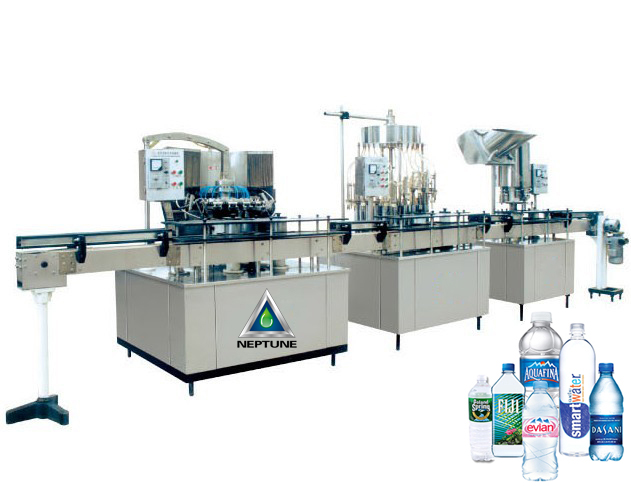
If you are intersting in our 12-12-1 bottled water filling machine please do not hesitate to contact us.
Bottle Washer MANUAL
- Normal Pressure Filler MANUAL
3.Screw Capper MANUAL
1.Bottle Washer
CONTENTS
1. Technological Parameters
2. Work Principles
3. Installation
4. Adjustment
5. Maintenance
6. Attention
7. Schematic Circuit
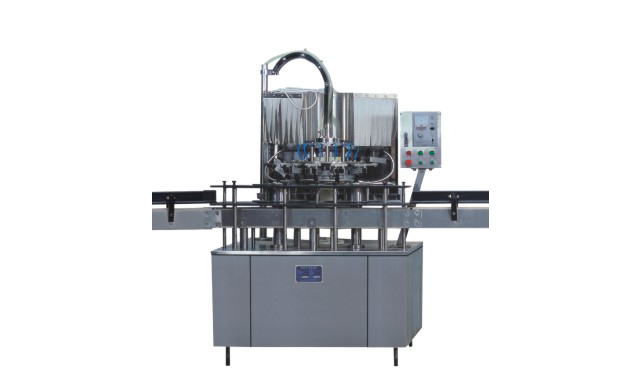
QS-12 Model Auto Bottle Washer is manufactured on the base of absorbing foreign advanced technology by our company. It has advantages of high auto level, compact structure, reasonable design, beautiful appearance, simple regulation and others. It is an ideal equipment of washing polyester bottles of middle-small drink production enterprises.
1. Technological Parameters
1. Appearance Size: 1200×1200×1800
2. Weight: 960㎏
3. Motor Power: 0.55KW
4. Production Capacity: 2000B/h (for 0.5L bottle)
5. Polyester Bottle Specification: Diamater: Φ50~Φ100mm
Height: 120~320mm
2. Work Principles
This machine adopts YCT112-4A electromagnetic governing motor. The transmission drives the rotary table on which the gripping bbottle devices are fixed. The gripping bottle device rotates with the rotary table. The bottle is rotated into the bottle entrance section with the bottle entering device. The gripping device grips the bottle to make the bottle enter the washing section. The bottle is made to stand up-bottom under the help of the track. The washing valve opens and the washing liquid enters the bottle. First it is washed with sterilizing agent, then with fresh water. After it is washed twice, the bottle is driven out by the driving wheel of bottle exit under the help of the track. The bottle washing is finished.
3. Installation
The machine must be installed vertically and horizontally.
4. Adjustment
1. The fresh water pipeline and the blow-off pipe.
2. The motor wires jointing must meet the rotation direction marked on the machine, Forbid the rotary table rotating in opposite direction.
3. Loose the fixing bolts of the upper and lower tightening rings. Adjust the nuts on the rotary mainshaft according to the height of the bottle. The gripping bottle cam is adjusted to the middle position.
4. Joint the switch power of the sterilizing liquid and the fresh water inlet pumps, then joint the switch of the main motor, rotate the governing button to adjust the rotary speed. Watch if the machine runs smoothly. If all is OK, bottle can be put in to try operation.
5. If different diameter bottles are used, the entrance and exit driving wheel and their arc-plate concerned must be exchanged. At the same time, the distance between the two baffle plates on the entrance and exit tracks is also adjusted to the proper position.
5. Maintenance
1. Before each shift works, all of sections must be checked. If some parts loosen or other troubles are found, they must be resolved, then the machine can be started.
2. All gears and guideway, cam 12 must be filled with consistent grease 2~3 times each week.
3. The lubricant in FCO-80 worm gearing must be exchanged after the device is used first for 1000 hours. The lubricant is 120~150# industrial gear oil. Later, it is exchanged once half a year.
4. After each shift goes off work, do some cleaning and filling oil in each running section.
6. Attention
1. Before a new machine is started, first the power source of the water pump must be jointed, then the one of the main motor is jointed.
2. If there is leak in some site of the rotaty valve, please adjust the top bolt to make the rotary valve pressing tightly.
3. If the driving wheel of entering and exiting bottle misplaces, adjust the position which makes the gripping bottle device aiming at the driving wheel.
2.Normal Pressure Filler MANUAL
CONTENTS
1. Summary
2. Technical Parameters
3. Work Principle
4. Installation
5. Debugging
6. Maintenance
7. Common Trouble and Removals
1. Summary
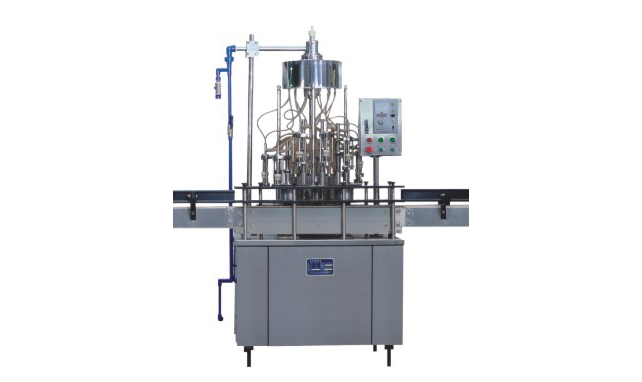
CY Series Normal Pressure Filler produced by our factory is used to fill all kinds of bottles (as glass bottle, PET bottle, etc.) with all kinds of drinks (as wine, sauce, vinegar, juice, water, etc.). It is connected into a line together with the screw capping machine. This machine has advantages of advanced and compact structure, beautiful appearance, easy maintenance. It is an ideal filling equipment for beverage industries.
2. Technical Parameters
1. Dimension: 1200×1000×1950mm
2. Net Weight: 750㎏
3. Total Power: 0.92KW
4. Production Capacity: 2000B/h (for 0.5L bottle)
5. Suitable bottle size
a. diameter: 40~100mm
b. bottle height: 50~235mm
6. Filling Accuracy: Liquid level ±3mm
3. Work Principle
This machine works by the effect of atmospheric pressure. The liquid level in the
liquid cylindor is controlled by buoy’s lifting adjustment. The scale of the liquid level
is 0~50mm.
4. Installation
1. The working ground of the machine should be adjusted to an even level.
2. The footings of the machine should be fixed tightly to avoid from shaking or
shifting.
5. Debugging
1. First check if the installation is qualified to the requirement and the connection with the front and back convey is smooth.
2. First connect the motor and liquid pump and test it once to see if the direction is correct. If something wrong, find the reason and remove it.
3. Test the liquid cylindor supplying control. Liquid difference on 30~50mm is proper. If the liquid level is high, upper proximity switch works and stop the liquid pump. If the liquid level is low, the nether proximity switch works and the liquid pump starts to operate.
4. Make filling test, when all work filling quantity is qualified, input the cleansing liquid, try filling while cleaning all the liquid convey pipes and cylindor.
5. Add necessary lubricant into the activated parts and test the machine.
6. Mainenance
1. Before operating the machine, check no loosening in each part.
2. Start the machine to see if it work smoothly and if every work position is in the right position.
3. After stoping the machine, clean and dry it.
4. Add lubricating grease into the gears under the work table, add lubrication oil in other parts.
7. Common Trouble and Removals
1. If the bottle input and output is not smoothy, adjust the distance of thumb wheel, arc plate and baffle.
2. If the work position is not correct, check if the nut is lossened, tighten it.
3. If the filling liquid level changes, adjust the height of the air exhaust pipe. If the “O” ring loses its effect, change the new one.
3. Screw Capper MANUAL
Contents
I Usage
II Main Technical Parameters
III Using Range
IV Operation Instruction
V Maintenance
VI Checking Items and Requirements
VII Drawing Structure of Screw Capping Part
I Usage
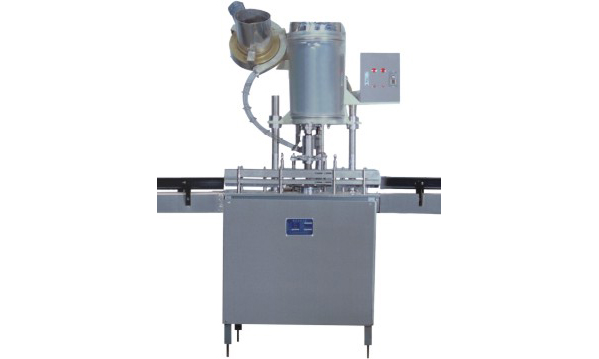
FXZ-1 Model Screw Capper is widely used for capping all kinds of plastic or glass bottles of gas containing drink or no gas drink.
It has the advantages of reasonable mechanical structure, stable in moving, good in feature, easy operation and maintenance, widely used. So it is the necessary equipment for drink producers.
II Main Technical Parameters
1. Motor Power: 0.55KW
2. Cap Orderer Power: 0.12KW
3. Production Capacity(in theory): 2400B/h
4. Dimension(L×W×H): 920×740×1950
5. Weight: 350㎏
III Using Range
1. Bottle Diameter: Φ50~Φ100mm
2. Bottle Height: 150~330mm
3. Bottle Mouth Screw Diameter: Φ27.5
4. Theft Proof Cap Size: Φ28×15(inner size)
IV Operation Instructure
FXZ-1 Model Screw Capper has the bottle in &out device, can be matched with other machine of the drink production line, and should be tested as the user’s bottle samples and cap samples before carrying out of the factory.
1. When the bottle diameter is changed, change the bottle in&out block, and main shaft pushing wheel.
2. When the bottle height is changed, adjust three column’s height by nut and the main shaft height by locking wheel.
3. If the cap screws too loose in the bottle, adjust the distance between the screw capping head and the bottle mouth thumb wheel. The more distance, the less pressure; the less distance, the more pressure. When adjusted to the most suitable position, screw tightly. If the capping screw is too long to break the cap, dismantle the screw capping head, fix the aiming stick to aim with the bottle mouth thumb wheel. If it is still breaking the cap, just adjust the 3 adjustable screws of the screw capping head.
4. For plastic cap, the capping head should be ordered according to the user’s cap size. See the drawing.
V Maintenance
1. Every day check the locking nut 2 and micro-adjustable screw 3 on the capping head, tight them.
2. Each shift, add the mechnical oil(30#) in the centre shifting shaft on the capping head.
3. Each shift, oil the gear and worm gear.
4. Each shift, oil the shaft of the knife plate and knife rod, and the roller of the knife rod.
VI Checking Items and Requirements
| No. | Checking Item | Aim Value | Allowed Value | Checking Method | Test Result |
| 1 | Rotary feature, screw length, cap sealing | Even, reliable | Even, reliable | Fill the bottle with required volume water, continuouslly screw cap for 12 times, check the length of the screw by eyes, it should be even and same, and no part breaking, check several sealed bottles as will, press the bottle to see if it’s leak. | |
| 2 | noise | 80db | 80db | Test by instrument when no loading run. | |
| 3 | Appearance (Painted parts) | No dropped paint | No dropped paint | Check by eyes. | |
| 4 | Gliding rotating parts | Apply rustproof | Apply rustproof | Check by eyes |
